
This post contains affiliate links, which means I may earn a small commission if you buy through them, at no extra cost to you. I only share things I actually use (or genuinely want to try, and I’ll tell you which is which).
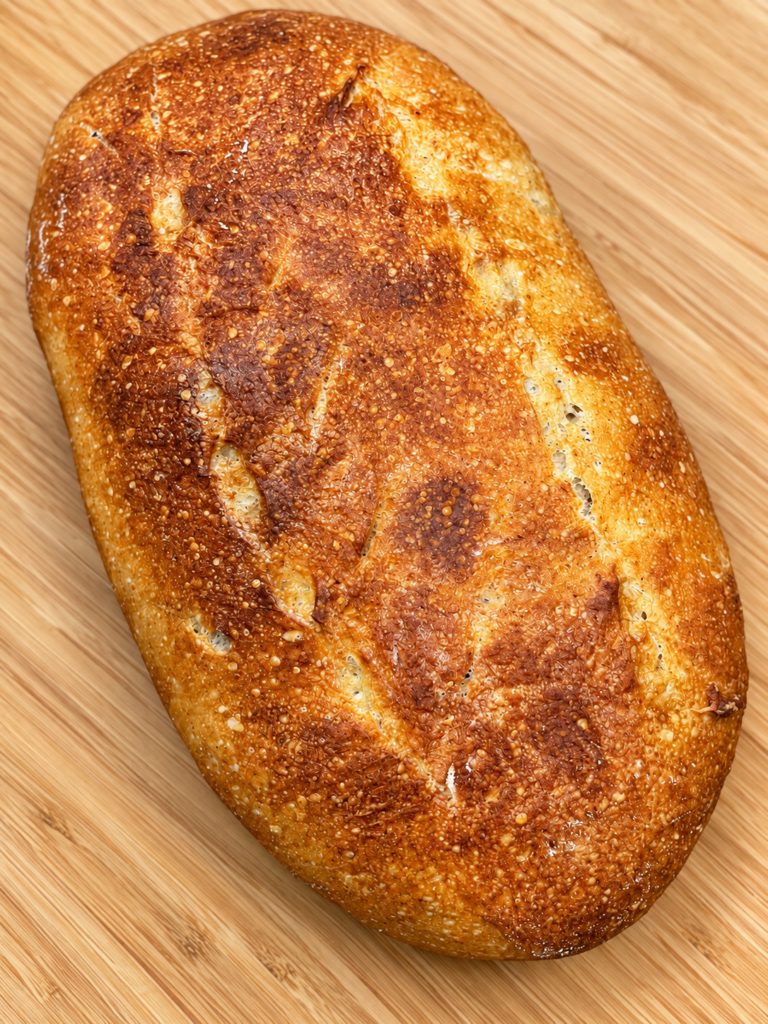
Let’s get this out of the way: you do not need a Dutch oven to bake sourdough bread. I’m proof. Sourdough bread without a Dutch oven is completely doable; it just needs a loaf pan, a bit of steam, and some patience with yourself.
If you’ve scrolled through sourdough content online, it can feel like everyone owns a heavy cast iron pot and you’re the only one standing in your kitchen with a regular loaf pan. This post is for you. This is how I bake sourdough bread in a loaf pan, what went wrong along the way, and what I’d tell you if you were standing next to me.
Key Takeaways
- You can absolutely bake sourdough in a loaf pan. Start with what you already have.
- My simple recipe: 400g flour, 280g water, 80g starter and 8g salt.
- I cold proof overnight in the fridge, let it sit at room temperature for about an hour and a half, then bake at 180°C: 20 minutes covered with foil, 25 minutes uncovered.
- Take the loaf out of the pan promptly, or condensation can turn the bottom soggy.
- A pan of water and a little water added carefully to that pan provide steam.
- Go by feel: three sets of stretch and folds, and stop when the dough holds its shape.
- Know your own kitchen. Heat, your oven and your starter all change the timing.
Why I Started With a Loaf Pan
I didn’t have a Dutch oven. I do own one beautiful pink Le Creuset (it was a birthday gift!), but it’s a very shallow pan and definitely not made for baking bread. So even though so many creators online use a Dutch oven, I went looking for recipes that didn’t need one.
I make normal bread regularly for my family, so I already had loaf pans and bundt pans in the cupboard. That’s where I started. My advice is simple: just start with what you have.
My First Bakes (and What Went Wrong)
If you’ve read my sourdough starter journey, you know my first two attempts at making a starter were total failures. Once I finally got a starter going, my first actual bake was okay, honestly. It didn’t rise as high as it should have, and I think it was a bit underproofed. I was so nervous about the timings and following every instruction exactly that I forgot to actually look at the dough.
My family was so supportive. My own reaction was “wow, I made bread!” It was flatter than yeasted bread, sure, but the more I baked, the better it got. And let’s be real, nothing beats a warm slice with plain butter. Fresh bread wins in my house every time.
What You Need
Here’s what I actually use and recommend. I’ll share my favourite sourdough tools and finds in a separate list.
- Mason glass jars and rubber bands for the starter. The rubber band marks how high it rises. Simple and it works.
- A simple digital kitchen scale. Weigh your flour. It makes everything easier.
- A regular aluminium loaf pan. Nothing fancy at all.
- A long spatula for scraping and handling sticky dough.
- Foil to cover the loaf for the first part of the bake, used safely and kept clear of heating elements.
- Parchment paper so the loaf doesn’t stick. I want to try silicone mats next, so I’ll report back.
- Disposable shower caps. Yes, really. They cover your bowl of dough and they’re reusable-ish and cheap. Don’t use them in the oven.
- A squeeze bottle for adding water to a separate steam pan.
My Easy Sourdough Loaf Pan Method
A quick note: these are my real numbers, from my real kitchen. Yours will be a bit different, and that’s okay.
1. Feed Your Starter in the Morning
I don’t feed my starter every day (that’s a whole other blog post!). I bake about once a week, sometimes twice now, so I feed the starter the morning I’m going to bake. How much I feed depends on how much starter I have left and how many loaves I’m baking.
I use a 1:3:3 feeding, which is 1 part starter, 3 parts flour and 3 parts water. This is my basic method. Sometimes if I’ve left my starter unfed for too long, like more than two weeks, I’ll feed it twice to let it become stronger. In my kitchen, my starter typically doubles in about three hours. That’s my cue that it’s ready to use. (The rubber band on the jar makes this so easy to see.)
2. Mix the Dough
Here is my basic sourdough loaf pan recipe for one loaf:
| Ingredient | Amount |
|---|---|
| Bread flour | 400 g |
| Water | 280 g |
| Active sourdough starter | 80 g |
| Salt | 8 g |
When I first started, I made a 300g loaf, which turned out a bit small. Now my average loaf uses 400g of flour, and with everything else added in, that makes a solid loaf of almost 800g and fits nicely in my loaf pan. Mix it all together, then leave the dough to rest for one hour.
3. Stretch and Folds
I do three sets of stretch and folds. The first set is after one hour, then the next two are 30 minutes apart. I stop when the dough feels like it’s keeping its shape. That’s my signal. Not a timer, the dough itself.
Timing guide: First set after 60 minutes; second set 30 minutes later; third set another 30 minutes later. Check that the dough has developed strength and fermented sufficiently before shaping; stretch-and-fold completion alone doesn’t determine when bulk fermentation is done.
4. Shape It and Cold Proof Overnight
Line your aluminium loaf pan with parchment paper so nothing sticks, then shape your dough and tuck it in. Then it goes in the fridge for an overnight cold proof. This is such an easy way to work sourdough around real life, because the long wait happens while you sleep.
5. Let It Come to Room Temperature
I take the dough out early the next morning and let it sit at room temperature for about one and a half hours. It rises a little more during that time, which is exactly what you want before it goes in the oven. Watch the dough: cooler or warmer kitchens may need a different time.
6. Create Steam Without a Dutch Oven
This is the part people worry about, so here’s my way: I put an oven-safe metal pan of water in the oven, and I carefully add some water to that pan with a squeeze bottle. That’s my method of making steam for sourdough without a Dutch oven, and it works for me. Be careful of hot steam and never squirt water onto the glass door, heating elements or electrical parts.
7. Bake
I bake at 180°C for 20 minutes covered with foil, then 25 minutes uncovered. Fun confession: my oven dial is sort of broken, so everything I bake goes in at 180°C, no matter what. It’s not perfect, so I keep a close eye on things and keep bread and bakes covered for part of the time.
Safety note: A faulty oven control that causes electrical tripping needs assessment and repair by a qualified technician. My temperature is a description of my experience, not advice to use a defective oven. Always bake with a safe, properly functioning appliance. Your loaf should be thoroughly baked; a thermometer reading around 93–96°C (200–205°F) in the centre is a useful check.
8. Get It Out of the Pan Fast
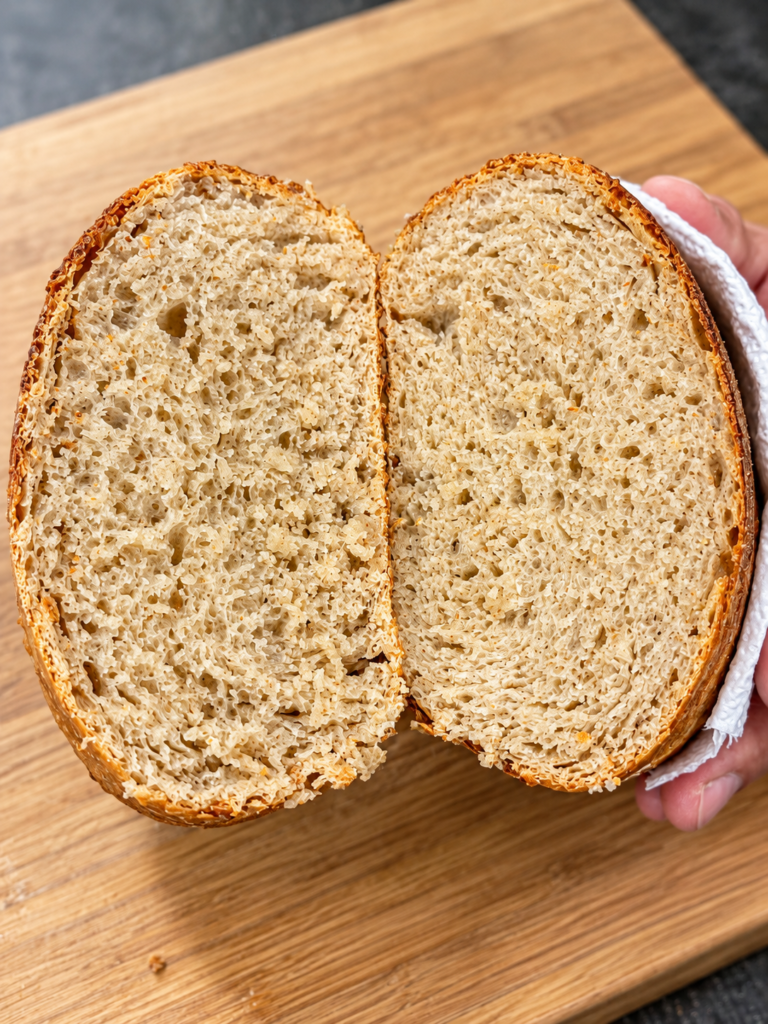
This is my extra tip, and it’s an important one. Take your loaf out of the loaf pan promptly. Don’t let a hot loaf cool down in the pan, because the condensation can make the bottom wet and soggy. Out of the pan and onto a rack is the way to go.
Baking in a Hot Climate
I bake in a hot climate, and the biggest thing I’ve noticed is that everything rises faster. Dough and starter move quicker than the recipes online say they will. So don’t trust the clock blindly. Watch the dough, and learn what your kitchen does to it.
The 3 Biggest Beginner Mistakes (From My Own Flops)
- Not keeping a close eye on your starter. It tells you a lot, so check in on it.
- Sticking rigidly to the instructions forever. Follow them first, absolutely. Then start finding your own way.
- Giving up. Don’t stop trying. Every flat loaf teaches you something.
If You’re Scared to Start Sourdough
I won’t tell you it’s easy. But trying is half the fun. Play it by feel, get to know your kitchen environment, and learn how the dough feels when you do your stretches. You’ll get there.
Frequently Asked Questions
Do I Need a Dutch Oven to Bake Sourdough?
Nope. I don’t bake with one. I use an ordinary loaf pan, parchment paper, and a pan of water for steam.
Can You Bake Sourdough in a Loaf Pan?
Yes! It’s how I started and how I still bake. I use a regular aluminium loaf pan lined with parchment paper.
How Do You Make Steam for Sourdough Without a Dutch Oven?
I put an oven-safe metal pan of water in the oven and carefully add water to that steam pan with a squeeze bottle. I also bake the bread covered with foil for the first 20 minutes.
Why Is My Loaf Pan Sourdough Flat or Dense?
Mine was flatter at first, and I think it was underproofed because I was too nervous about timings to watch the dough. Look at the dough, not just the clock. Stop your stretch and folds when it holds its shape, and make sure the loaf has proofed sufficiently before baking.
Do I Have to Feed My Starter Every Day?
I don’t. I bake once or twice a week, so I feed my starter (1:3:3) the morning I bake, depending on how much I have left and how many loaves I’m making.
What to Read Next
Elle, Lately Tip: Learn what your oven and your kitchen do, keep a close eye on the first few bakes, and write down what you see. That notebook is worth more than any fancy pot. Make sure your oven is in safe working order.
Happy baking! 🌸